
VMware recently announced the release of the User Environment Manager (UEM) product. This is the former Flex+ product from the acquisition of Immidio. I have had the opportunity to test the solution over the past several weeks. I really like the solution and the granularity of application and environment settings that can be managed. I will be releasing several blog articles going over how to use different features within VMware UEM. In this initial article in the VMware UEM blog series I will go through the process of installing and doing initial configuration of the UEM solution.
Overview:
VMware User Environment Manager (UEM) can be used to manage Windows and application settings across hardware types and operating systems. Instead of managing user settings within the monolithic Windows profile, settings are managed individually with .xml files and registry keys. This allows application settings to dynamically roam between physical systems, virtual desktops and RSDH published applications. The solution can also be used on physical systems. This means a user can make an application change on a Windows XP physical desktop, open the same application through RDSH on 2012 server and the settings from XP will persist. This is possible because UEM doesn’t rely on the Windows profile to store and retrieve data. Solutions that rely on the Windows profile cannot easily migrate between older and newer Windows operating systems as there are V1 and V2 profiles. XP and Server 2003 use V1 and Windows 7 and 2008 Server and later use V2. VMware UEM has no issue roaming settings between these operating systems.
What I really like about VMware UEM is that there is no infrastructure required. It utilizes what the customers already have in place today. It simply requires two file shares (configuration data and user data) and Microsoft Group Policy in order to setup the solution. UEM uses Group Policy to execute the process of copying user application settings to the Windows system on logon, and to the file share on logout. There is a management condole which points to the configuration file share and provides an easy to use GUI for modification of settings.
One feature I really like and think will be extremely valuable to customers is DirectFlex profiles. When using a DirectFlex profile, instead of injecting the application setting when the user logs in, UEM will copy the settings when the user launches the application. We can also trigger custom actions when the application launches. Think about how many applications require custom mapped drives or printers. Typically, we would map those drives or printers when the user logs into the setting with a logon script. With DirectFlex profiles we can map the drives or printers only when the user launches the application that needs them and remove them when they exit out the application. Very cool!
That’s it! No database, no dedicated server. Let’t go through the process of initial configuration of VMware UEM now.
Installation:
UEM File Shares
When installing VMware UEM, the file shares should be created first. There are two files shares required, a share for configuration data and one for user data.
UEM Configuration Share – This share contains all of the configuration data for UEM. Administrators will need to be able to read and write to this share and users will need to be able to read from it. The share can be any standard CIFS share. DFS namespaces are supported as well for use across a WAN. The space required on this share is very low – 1GB of space is typically sufficient.
Setting up the share:
Example Name: \\server\UEMConfiguration
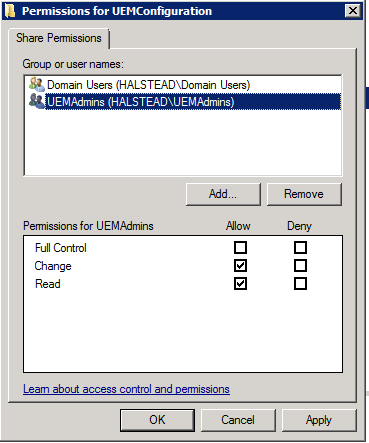
Share Permissions: UEM Administrators – Change
UEM Users – Read
NTFS Permissions: UEM Administrators – Full Control
UEM Users – Read / Execute
UEM Profile Archive Share – This share is used to store the personal settings for each user. A folder is created for each user under this share. Settings are read from this share and applied at logon or application launch (DirectFlex) and saved on logoff or application exit. Just like the configuration share, this is just a standard CIFS share and DFS namespaces are supported. The space required will depend on what type of data is being captured by UEM, but 100mb per user is a good number for planning purposes.
Setting up the share:
Example Name: \\server\UEMProfileData
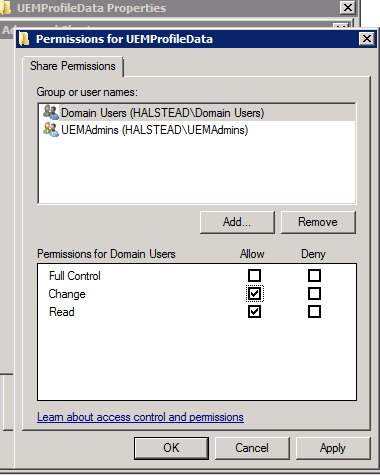
Share Permissions: UEM Administrators – Change
UEM Users – Change
NTFS Permissions: UEM Administrators – Full Control
apply to: “This Folder, Subfolder and Files”
UEM Users – Read / Execute, Create Folders / Append Data
apply to: “This Folder Only”
Creator Owner – Full Control
apply to: “Subfolders and Files Only”
Import Group Policy ADMX Templates
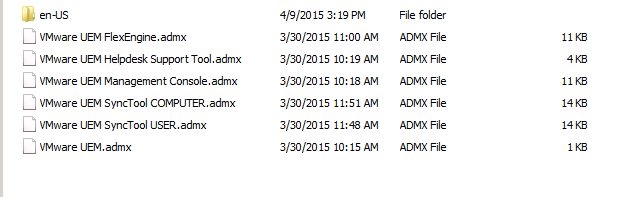
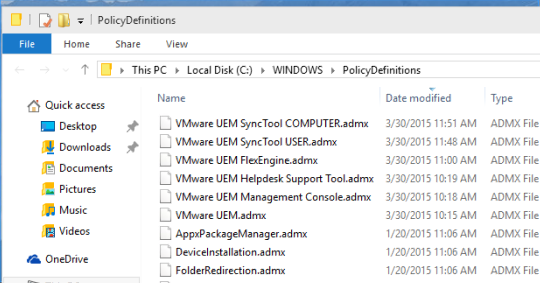
Now that we have our UEM file shares created we can import the ADMX files required for UEM. As I mentioned earlier, UEM relies on Microsoft Group Policy to apply and save settings. The templates are provided as ADMX files which must be installed into the central Active Directory policy store. There are six .admx and corresponding .adml files located in the installation files “Administrative Templates (ADMX)” folder.
Installing UEM ADMX Templates – Browse to the following path in your domain:
\\yourdomain.net\SYSVOL\yourdomain.net\Policies\PolicyDefinitions
Copy the six VMware UEM .admx files provided into this location
**NOTE – if UAC is turned on, you may note be able to write into this folder even if you have permissions**

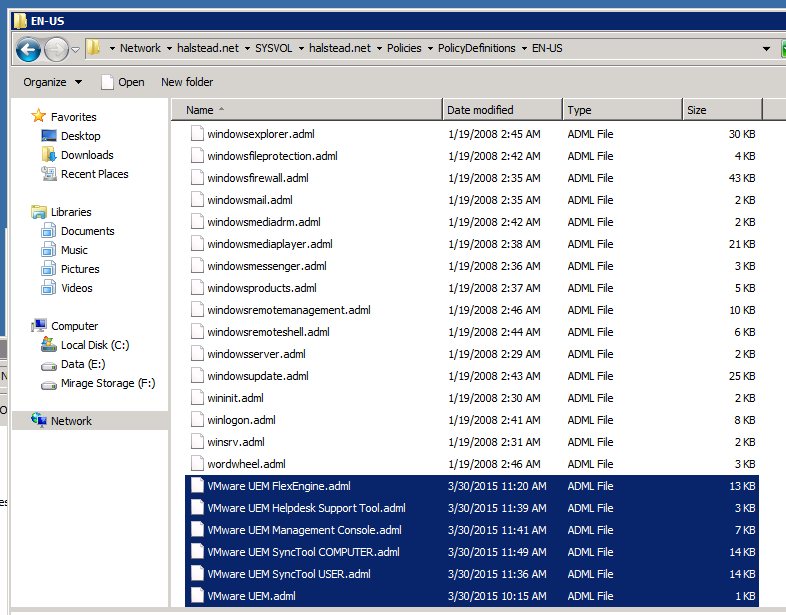
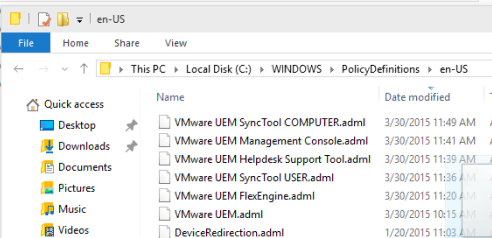
Copy the six VMware UEM language resource files into the en-US folder located at:
\\yourdomain.net\SYSVOL\yourdomain.net\Policies\PolicyDefinitions\en-US
POC Settings for ADMX Files
For a Proof of Concept installation, the ADMX and ADML files can be installed locally to %windir%\PolicyDefinitions and %windir%\PolicyDefinitions\en-us respectively. **NOTE – This is NOT supported for production environments.**
When using this POC method, all of the UEM GPO settings detailed in the next section will be managed via the Local Computer Policy MMC snap-in.
Configuration of UEM Group Policy Settings
Now that we have created the file shares and imported the ADMX files we can configure the Group Policy settings for UEM. VMware UEM only supports User settings in group policy. The GPO settings should be applied at an OU where the users who will be using UEM are located. If this is not possible, the computers the users will log into can be in the OU where the UEM GPO settings are applied, but Loopback Processing must be enabled.
Open the Microsoft Group Policy Management Console and browse to the OU you want to apply the VMware UEM settings to. Right-Click the OU and select “Create a GPO in this domain, and Link it here”. Name the GPO and then right-click the policy and choose edit to modify it.
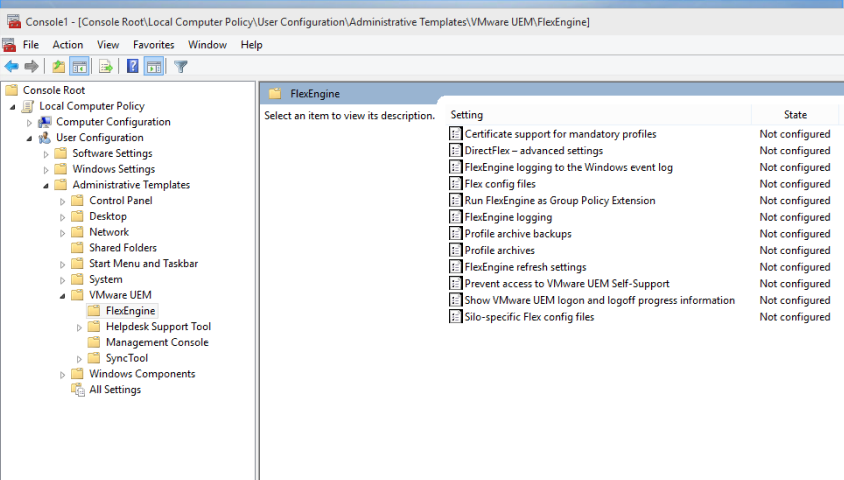
Browse to: User Configuration | Policies | Administrative Templates | VMware UEM | FlexEngine
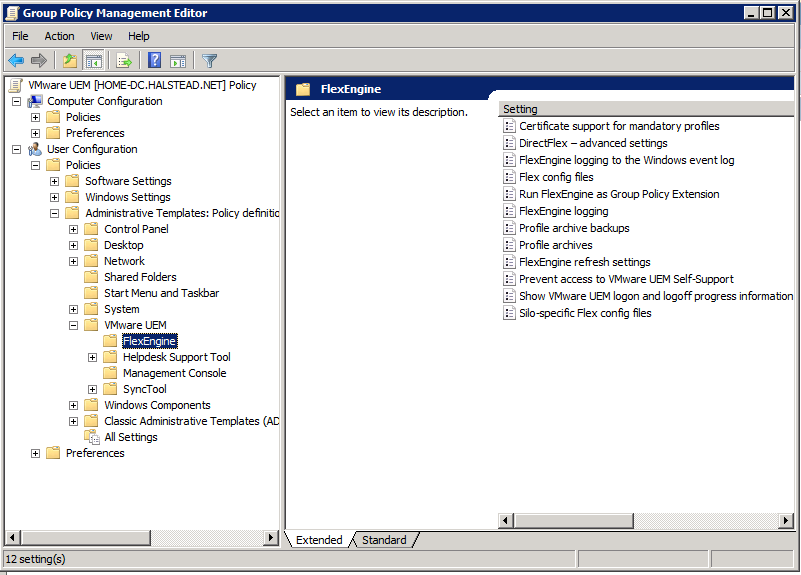
We will just configure enough to get UEM working for user settings. There are many other settings and features, but I will cover those in future articles.
Let’s configure the minimal settings required at this time.
Flex Config Files: Double-Click the Flex Config Files setting to modify it. Select “Enabled” then specify the path to the configuration share you created earlier. Add a “General” Folder at the end of your file share path. This is where UEM will create the configuration files. Check the “Process folder recursively” box. This allows UEM to read all of the sub-folders in the configuration share. If you wanted certain users to only see specific settings you could restrict them to a single folder by leaving this box unchecked.

example:example:\\home-dc\uemconfiguration\general
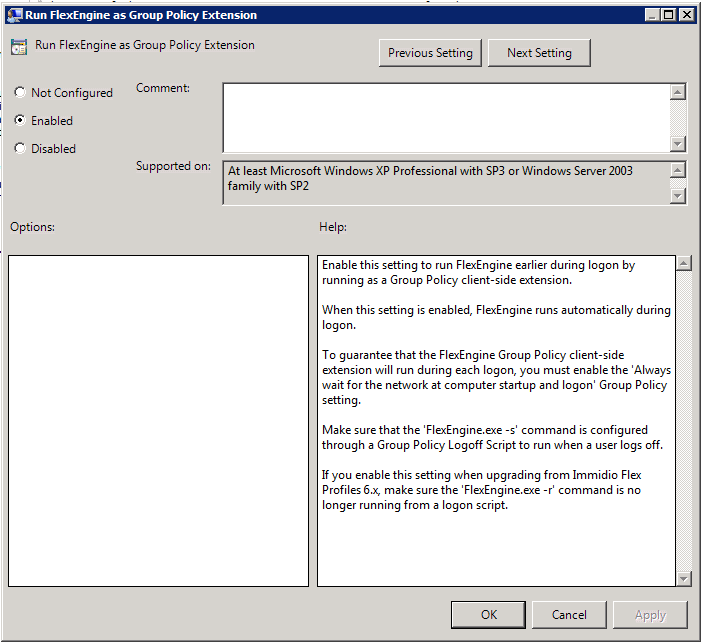
Run FlexEngine as a Group Policy Extension: Edit this setting and choose “Enabled”. This is essentially the on/off switch for applying settings with VMware UEM. If this setting is not enabled so settings will be applied on logon.
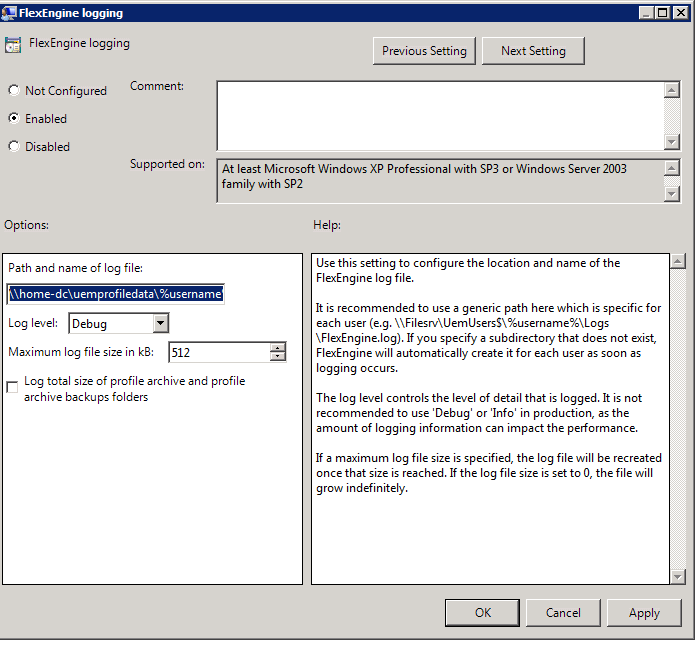
FlexEngine Logging: This settings allows VMware UEM to write log files into the user profile archive share. This is not required, but highly recommended to make sure you can properly troubleshoot and monitor the environment. Select “Enabled” and then type the path to the user profile archive share created earlier. Append %username%\logs\flexengine.log at the end of the share path and click ok.
example:\\home-dc\uemprofiledata\%username%\logs\flexexgine.log
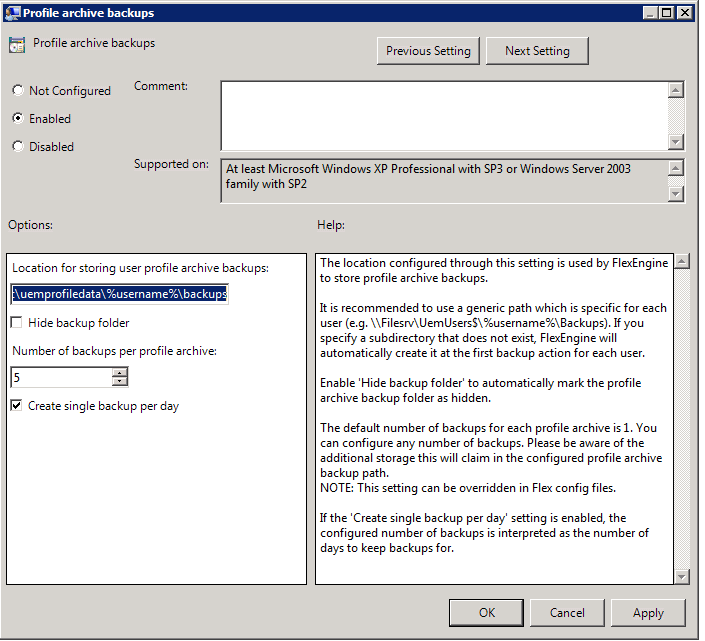
Profile Archive Backups: This settings is used to maintain backup copies of the user settings which can be restored via self-service or via the help desk. Select “Enabled” and then type the path to the user profile archive share appended with \%username%\backups. Change the “Number of Backups per profile archive” to “5” and check the “Create single backup per day box. Click OK.
example:\\home-dc\uemprofiledata\%username%\backups
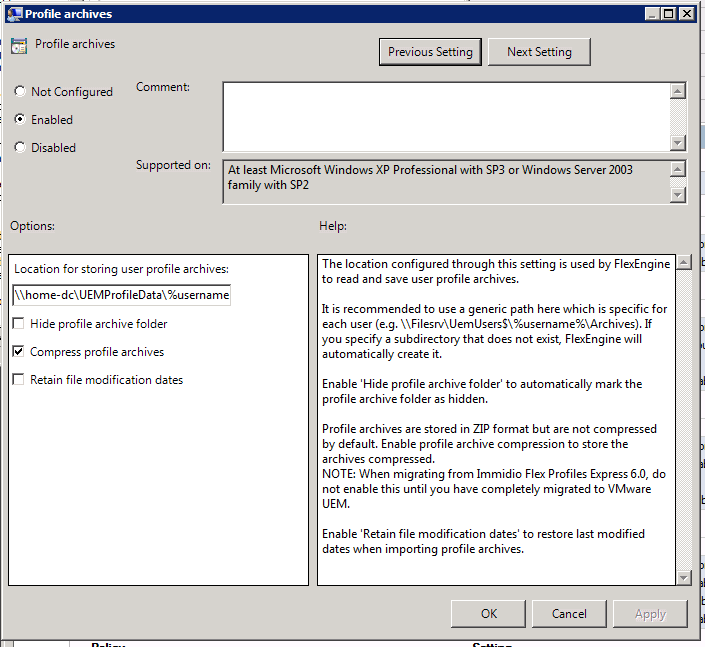
Profile Archives: This is the share you created earlier where the user settings will be stored. A subfolder will be created for each user. Select “Enabled” then enter the path to the user profile archive share appended with %username%\archives. Check the “Compress profile archives” box. This will .zip up the configuration data to save space.
example:\\home-dc\uemprofiledata\%username%\archives
These are all the user configuration settings that a necessary for VMware UEM. There are a couple of other general GPO settings that needs to be applied before we are done.
Set Logoff Script: We need to set a logoff script to ensure that all user settings are written out at logoff. It is done through a logoff script as there is no way to process actions on a logoff in Group Policy currently. This script will run the VMware UEM agent with a -s switch to save user settings on logoff.
Browse to “User Configuration | Polices | Windows Settings | Scripts (Logon/Logoff), and double-click the “Logoff” setting.
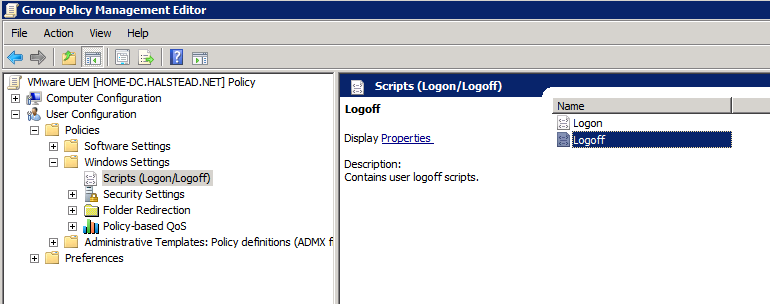
Click “Add” and type in the following:
Script Name: C:\Program Files\Immidio\Flex Profiles\FlexEngine.exe
Script Parameters: -s

Click OK to save.
General GPO Settings: There are a couple of general GPO settings that control the application of the VMware UEM GPO settings.
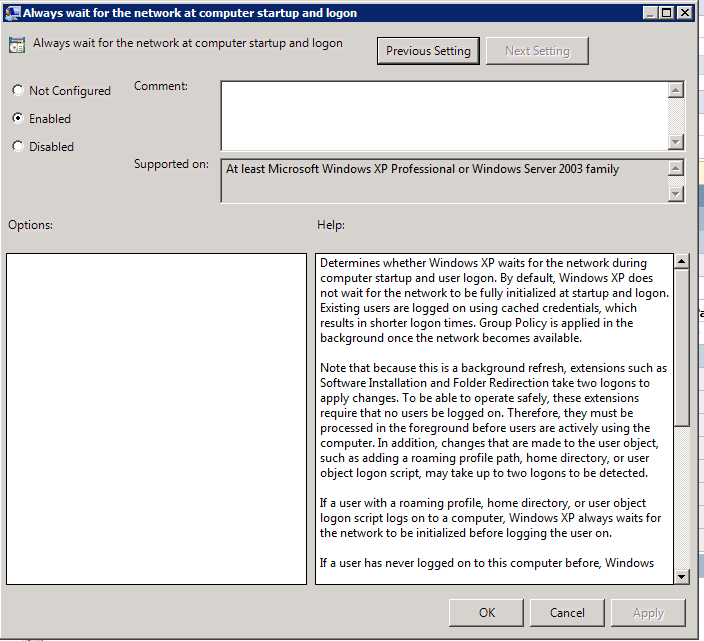
Always wait for the network at computer startup and logon – This setting ensures that the VMware UEM GPO settings will apply when the user logs into the system.
Browse to: Computer Configuration | Administrative Templates | System | Logon

Double-click “Always wait for the network at computer startup and logon”
Select “Enabled” and click OK
User Group Policy loopback processing mode (OPTIONAL) – This setting only needs to be turned on if you want to apply VMware UEM settings to at OU containing computer objects. If you are applying the policy to an OU with only user objects this policy setting is not required. To enable this setting do the following:
Browse to: Computer Configuration | Administrative Templates | System | Group Policy
Double-Click “User Group Policy loopback processing mode”, select “Enabled” and change the mode drop-down to “Merge”. Click OK to save the settings.
All of the back-end requirements for VMware UEM have been configured – we can proceed to installing the client and the management console.
Installing the VMware UEM client:
In order for VMware UEM to be able to manage settings on a system, the UEM FlexEngine must be installed. The UEM FlexEngine installation is provided as an .msi file. There is an .msi for both 32 and 64-bit systems. Choose the proper installation file, taking the defaults. You will need to specify the license file as part of the installation as well.

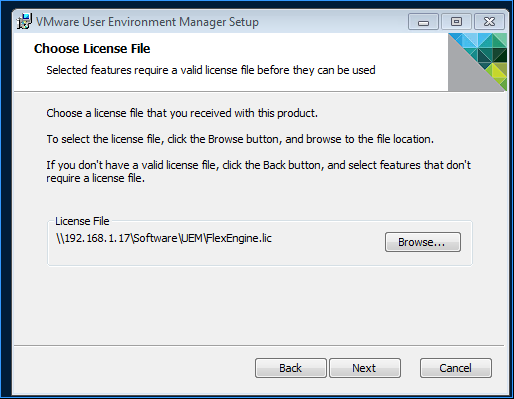
You can verify the FlexEngine install process succeeded by looking for the VMware UEM Service. For Virtual Desktops this can be installed within the Gold Image.
![]()
At this point we need to install the UEM Management Console.
Installing the VMware UEM Management Console:
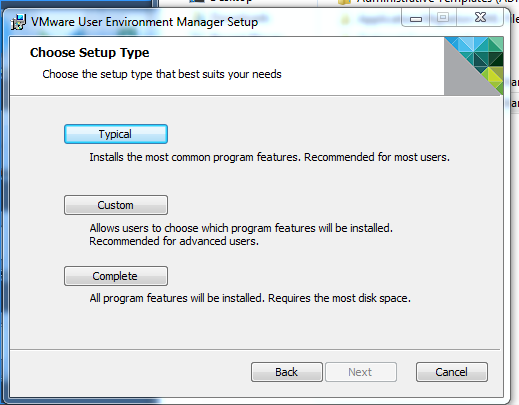
The UEM management console is really just a GUI front-end for the configuration share data. The configuration files can be modified inside or outside of the Management console. The same installation file that was used for the FlexEngine is used to install the Management console. Choose the proper installation file for the processor architecture you are going to run the console on and execute the install process.
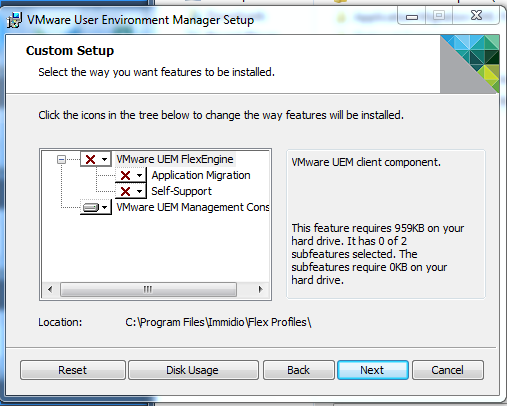
Select the “Custom” setup type and right-click “VMware UEM FlexEngine” and choose to NOT install on this computer. Right-Click VMware UEM Management Console and choose to install on this computer.
Now that the management console is installed we can connect to the configuration share and test the VMware UEM solution.
Initial configuration of Management Console
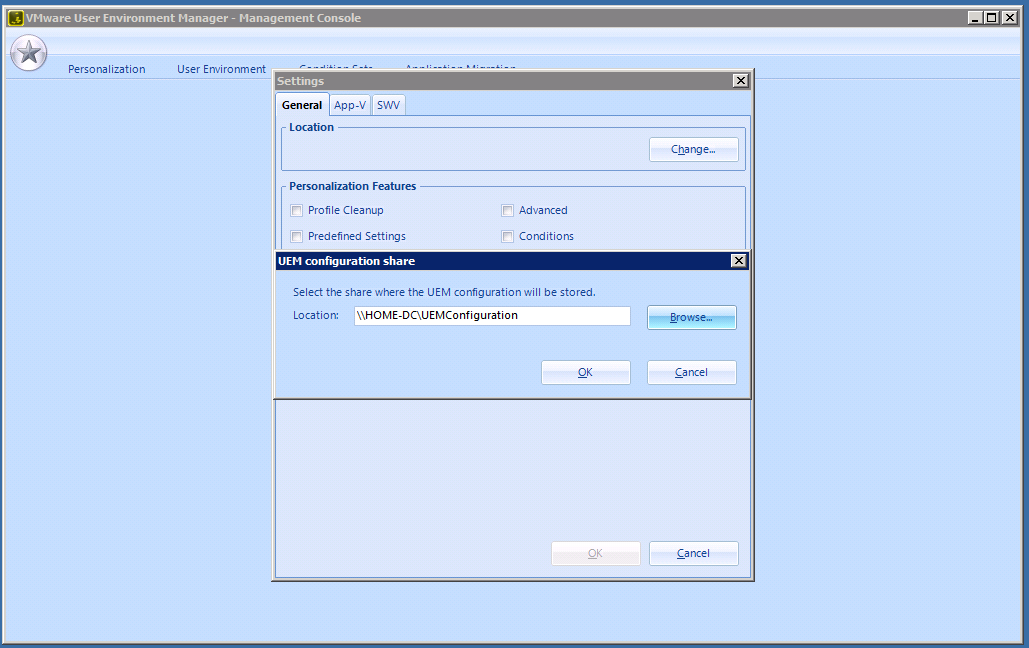
When you launch the VMware UEM Management Console the first time, it will prompt for a location of the UEM Configuration Share. This is the share we setup earlier – specify the share name and click OK
example: \\home-dc\UEMConfiguration
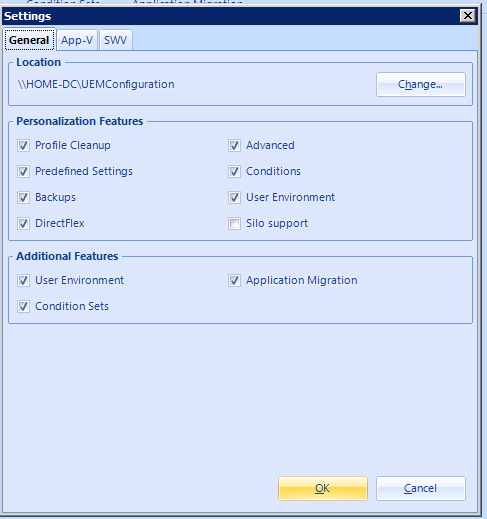
Take the defaults and click OK at the settings page.
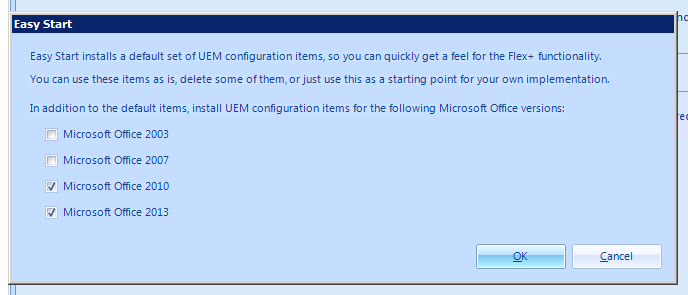
We will now enable “Easy Start” to pre-populate UEM with many popular Windows and Application settings. This is a great way to start and learn the product.

Select any versions of Office you would like to manage with UEM and click OK.
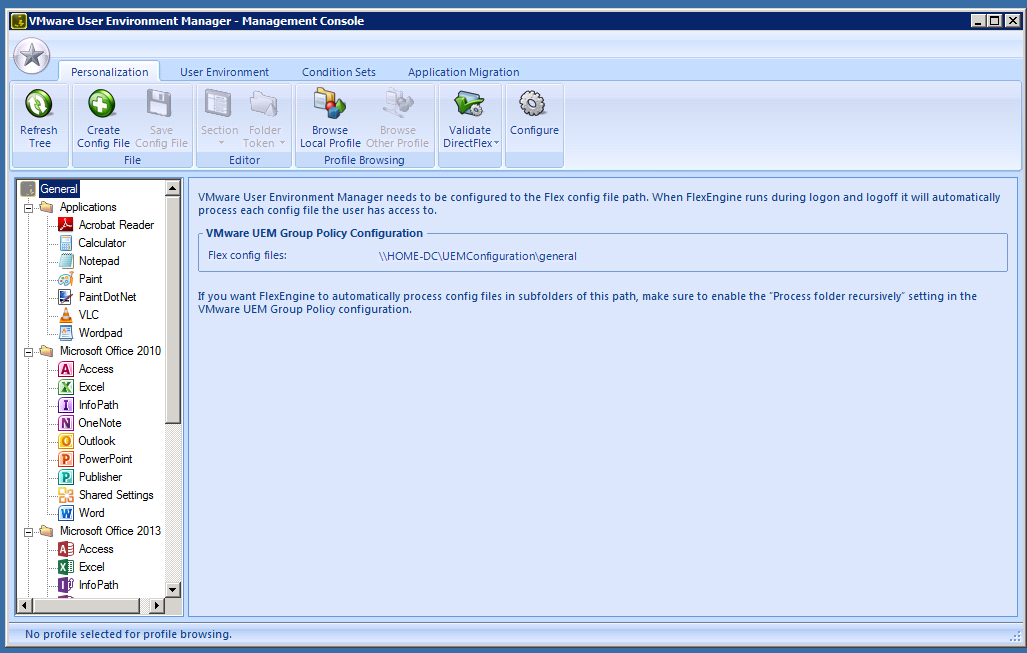
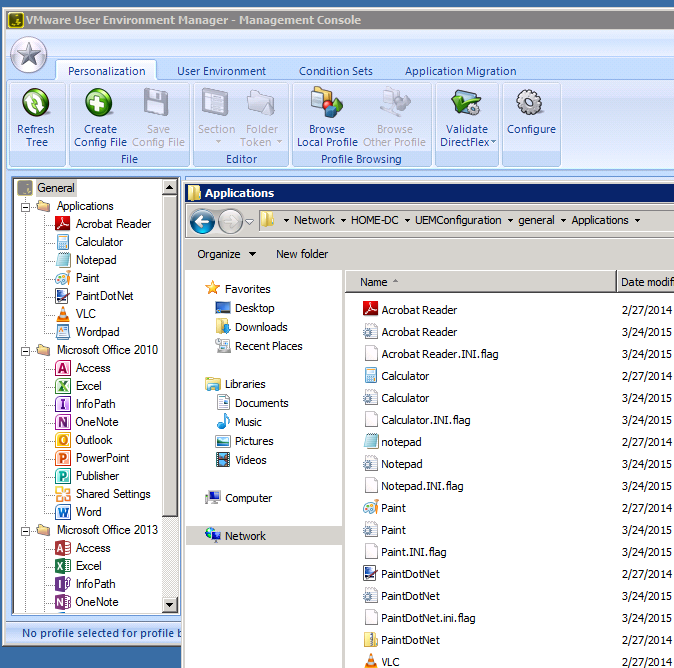
At this point we have done an initial configuration of UEM – we can verify that the settings have been copied to the configuration share by navigating to it and verifying it matches the settings in the Management Console GUI.
The next step is to test the UEM solution, review logs and start configuring Application, Windows and User Environment settings. These steps are covered in Part 2 of this blog series.


Pingback: VMware User Environment Manager, how to deploy and use | myEUC.net
Thank you very much, your blog commenting lists are great help to me in building inbound links to my blog.
Great Blog, need part 2 please….
How’s part 2 coming? We are running into a bunch of issues and I was hoping we might be able to figure out what they were from that…
Nice Article!!! Any updates on part 2 ?
Pingback: UEM and the search for the holy grail | flipITflop
Great article, everything was easy to setup. Although,when the GPO is applied. The PCs show a black screen with no icons, toolbars, or responses to anything other that ALT-CTRL-DEL. What am I missing?
Pingback: Horizon Group Policy and Profiles | Carl Stalhood
Is there a way to have multiple UEM Configuration Shares in the management console? I’m needing one for testing and production. I watched a video and it seems that when the person was demoing the product he had multiple UEM Configuration Share to chose from.
Thanks
Sunshienknox
Yes, this is possible, and a good way to move updates from dev to staging to prod. To create multiple environments, first create the shares, then click the star button at the top left of the UEM GUI. Select “Configure Environments” to add the additional configuration shares and then switch between them with “Switch Environment”