VMware App Volumes Self Service Utility
Last week we VMware held it’s Tech Summit for the SE and PSO organizations. As part of the event there was a Hackathon held where employees could develop a “hack” for existing VMware technologies. I participated and decided to develop a Self Service for App Volumes. This application won second place in the Hackathon, and with 17 pretty amazing teams participating, I was very excited and decided to share the application.
App Volumes is great and has a lot of flexibility, but it is primarily a “push” technology. You assign AppStacks to a user, group, ou or computer. This is somewhat static and when a user wants a new application they have to put a request in so an App Volumes admin who can then go into the App Volume manager and assign the AppStack.
With this utility, the process is “pull” where the user can see available AppStacks, select and attach them on demand. AppStacks are filtered automatically, and the user only sees those AppStacks which apply to the Operating System and Architecture they are running. The AppStacks are attached as Machine Assignments and are immediately available.
The user can also remove AppStacks on demand and any current or pending Assignments are visible through an Advanced View. There are also switches that can be used with a solution such as VMware UEM. The user can also right-click an AppStack to see what applications are installed in the AppStack prior to attaching it.
How It Works
The application is written in VB.NET 2013. When first launching the application, if no SQL connection has been established it will prompt the user to enter the address and name of the App Volumes database. The application runs under the security context of the user launching the application, so that user must have at least read access to the database.
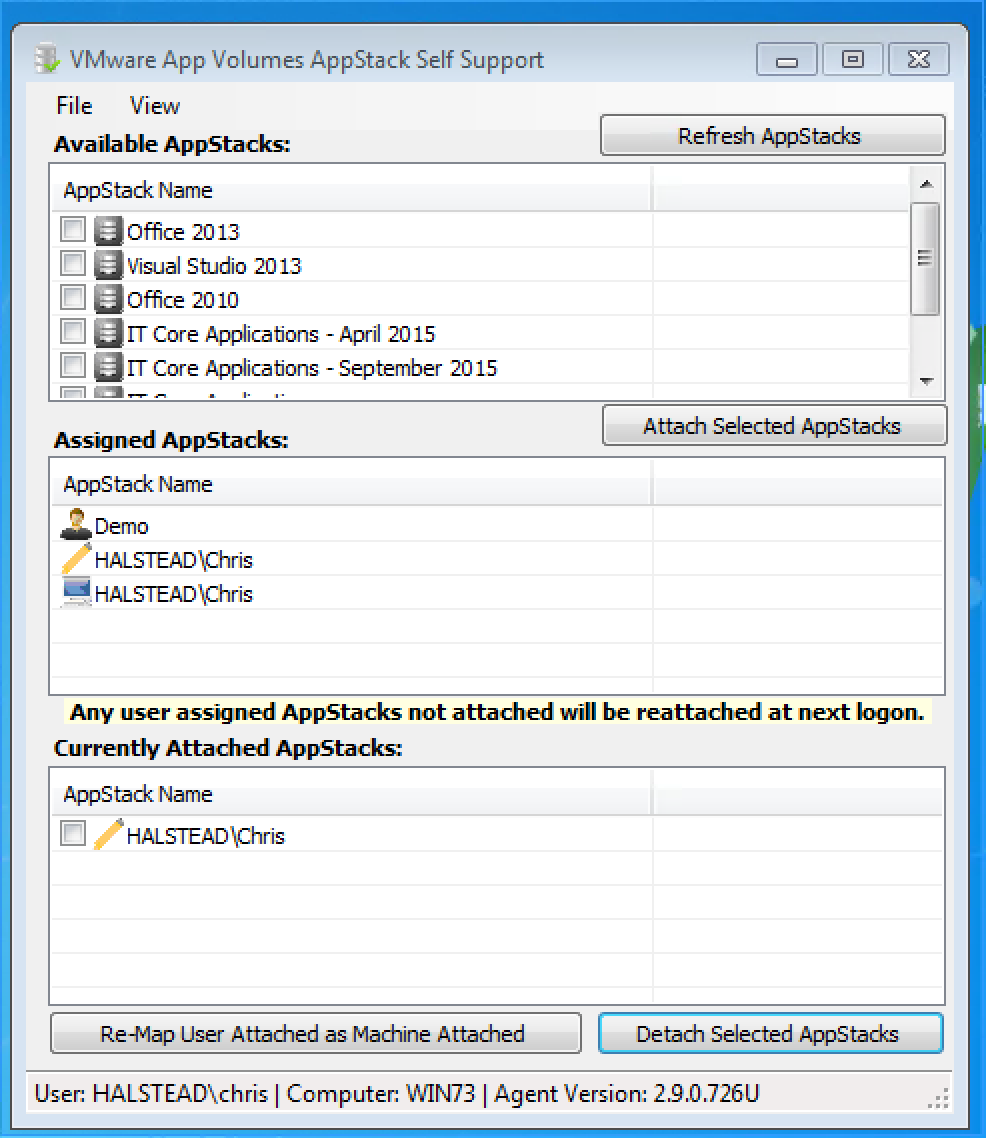
When the user clicks the “Refresh AppStacks” button, the application connects to the App Volumes database and filters AppStacks by OS and Architecture and provides the user a list. It also queries the database for an assignments for the current user or computer and will display those along with any currently attached AppStacks.
When a user selects one or more AppStacks to attach, the application first checks to see if there are any user assigned AppStacks attached. In AppVolumes, you cannot have both user assigned and computer assigned stacks attached at the same time.
This application will automatically remap any user assigned AppStacks as computer assigned so additional AppStacks can be attached to the current system. It will even remap a writable volumes if one exists. It attaches and detaches AppStacks using the svservice.exe file which is installed in every AppVolumes agent installation. The database is accessed read-only and any attach and detach actions are handled locally.
Pre-requisites
- App Volumes Agent installed and registered on the client
- .NET Framework 4.0
- Users must have read-only access to the App Volumes SQL Database
Usage
- Download Manage_AppStacks.exe from the link below and place on a system running an App Volumes Agent. If you try to run this application on a system without an App Volumes agent, you will get the message below and the app will exit.

- Make sure the user that will use this application have at least read-only access to the SQL database for App Volumes. You can accomplish this by creating a SQL login for an AD group, and granting that login access to the App Volumes SQL database. I would recommend only adding that login to the db_datareader role. This will only grant that login read-only access to the AppVolumes SQL database.

Also, make sure the SQL Server Browser Service is running on the SQL Server.
- Start the application by opening “Manage_AppStacks.exe”
Note – If running on a system with UAC, you may have to set this .exe to run as administrator.

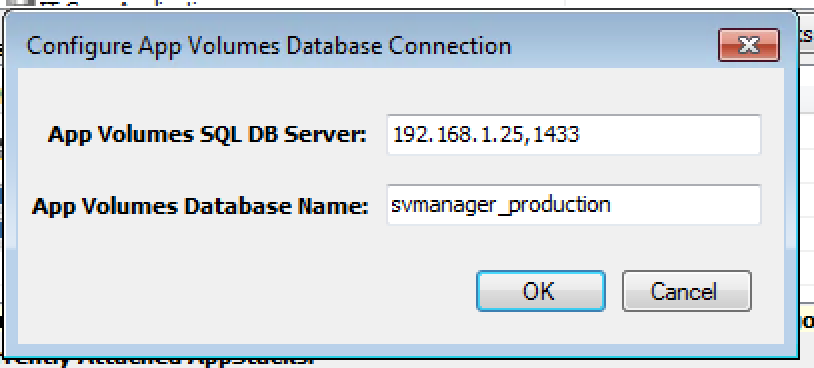
- The first time you launch the application you will get a message that no SQL Server is configured and you will be prompted for the SQL server name and Database name. Enter the name and any instances (ex: servername\instancename). If you need to specify a custom port for SQL, you can do that by adding a comma and port after the server name (ex. servername,port). These settings are stored in the registry under HKCU so once you put in a setting it will persist for that user. Settings can also be pre-populated with a solution such as VMware UEM.


 |
| - Once SQL has been configured, you can populate AppStacks. Click the “Refresh AppStacks” button. This will connect to the SQL database, and provide a list back of the AppStacks which can be attached to the system you are running on. You will also see any current attached AppStacks.

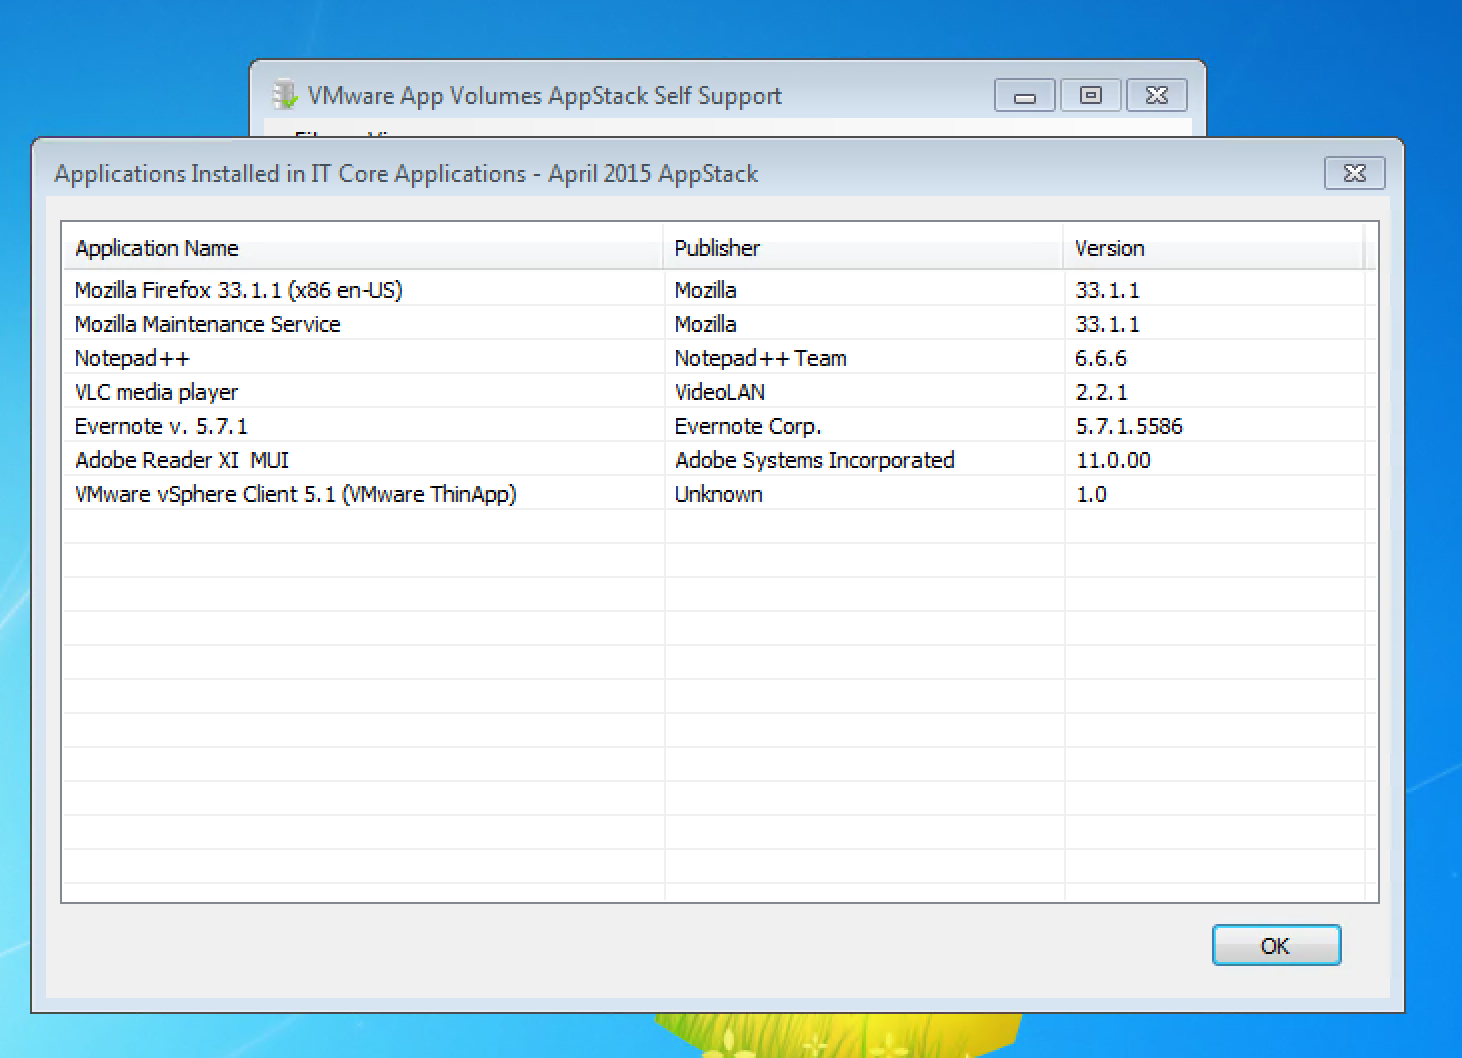
- You can also browse each AppStack to see what applications are installed inside of it, but right-clicking the AppStack and selecting “Show Installed Applications”.


- If you want to attach one or more AppStacks, simply select the AppStacks and choose Attach Selected AppStacks. You will receive a confirmation message showing the AppStacks you have selected. If there are no user assigned AppStacks currently attached to the system, the AppStacks will immediately attach and the applications will be available immediately.

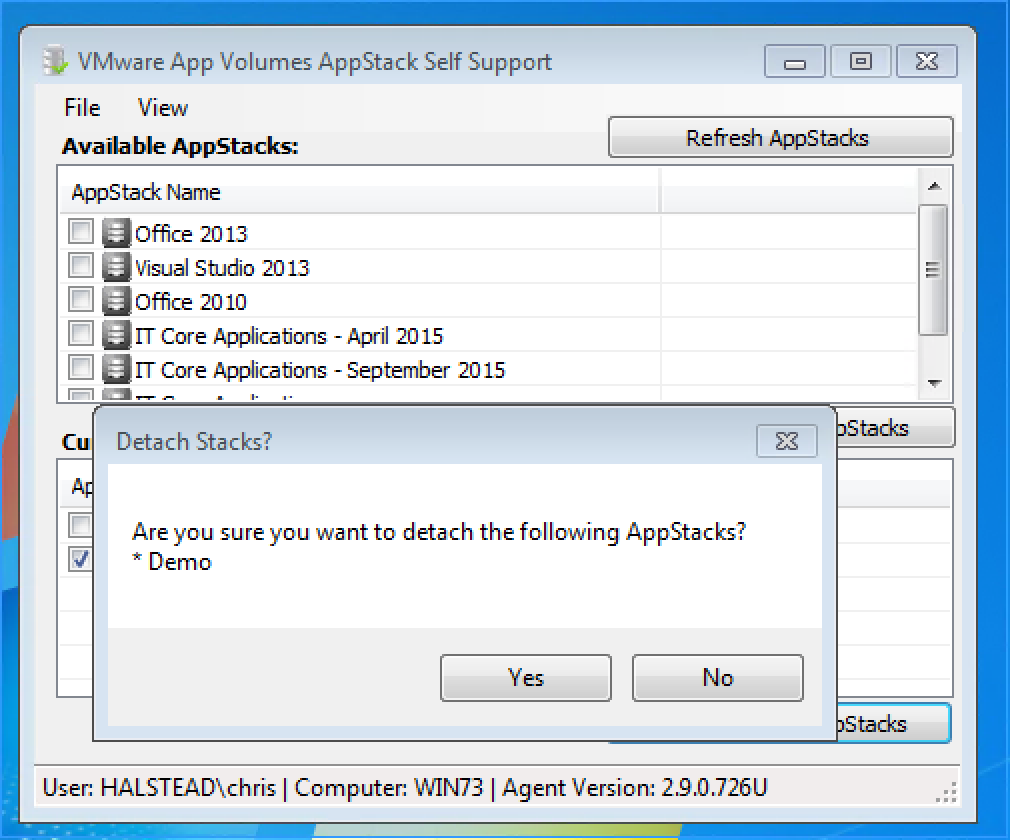
If there are user attached AppStacks you will see the message below with an additional confirmation message:

If you click yes any user assigned AppStacks will be re-attached as machine attached AppStacks. This allows the user to add additional AppStacks to the machine since both user and machine attached AppStacks cannot be mapped at the same time.
Note: Unless removed, there could be two assignments for an AppStack that is maped this way (Machine and User). In the Advanced section of this article I will discuss a /logoff switch that can be called through logoff script or UEM to automatically un-map any machine based assignments at logoff.
- AppStacks that are attached through the program can be dynamically removed by selecting any attached AppStacks and selecting “Detach Selected AppStacks”. The selected AppStacks will be immediately detached and unassigned.

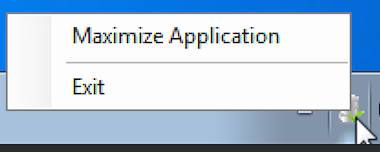
- To exit the application, you need to select File | Exit or choose Exit from the system tray context menu.


Advanced Features:
- Minimize to System Tray – The either minimized or the “X” close button is clicked from the application, it will be minimized to the system tray. There is a right-click context menu available from the tray icon that can be used to maximize the application or exit.

- Show Advanced Features –


- /logon Switch – This switch can be called from a logon script or UEM to automatically remap any user attached stacks as machine attached.

- /logoff Switch – This switch can be called from a logoff script or UEM to automatically un map any machine attached stacks attached during the user session.

- RDSH – This utility can also be used with RDSH servers (VMware or Citrix) that have the App Volumes agent installed. The utility will only show those AppStacks that apply to the RDSH host. AppStacks can be browsed by right-clicking to see what they contain. I publish this utility as a hosted application and manage the delivery of AppStacks to my RDSH hosts that way.


Conclusion
Hopefully this utility will be helpful. I will continue to update it – so keep checking this blog for updates. I will be rewriting this utility to use the App Volumes API, but since there is no RBAC for App Volumes yet, anyone who was going to use the application would need to be an App Volumes administrator. The first release with the API will allow the user to select if they want to use SQL or the API to read data.
Please let me know your feedback either as comments on this article, or be reaching out to me on twitter at @chrisdhalstead . A demo of the utility and the download are located below. Enjoy!
Demo of the App Volumes Self Service Utility
Check out the following video to see a demo of the Self Service Utility:
Download the App Volumes Self Service Utility
Click the below link to download and test this utility. I appreciate feedback and suggestions!
Download App Volumes Self Service Utility
USE AT YOUR OWN RISK. NO TECHNICAL SUPPORT IS PROVIDED FOR THIS PRODUCT.


