In this article I will walk through the process of installing and configuring VMware Horizon FLEX. Horizon FLEX provides policy-based management of encrypted, containerized Virtual Machines which run on a Type 2 Hypervisor such as VMware Player Pro or VMware Fusion Pro. The primary use cases of Horizon FLEX are the disconnected road-warrior, contractors and BYO users. It allows corporate customers to provide encrypted, managed corporate desktops to whatever desktop the end-user has and to set expiration or lock out the VM via Policy. Mirage can be used to manage the FLEX machines for Disaster Recovery, software distribution, backup and patching. This article will be modified as I learn more about the product and as the product is updated.
Installation:
Horizon FLEX is built on top of VMware Mirage 5.2, so the first step is to install Mirage 5.2. We will first go through the process of doing a basic installation of Mirage.
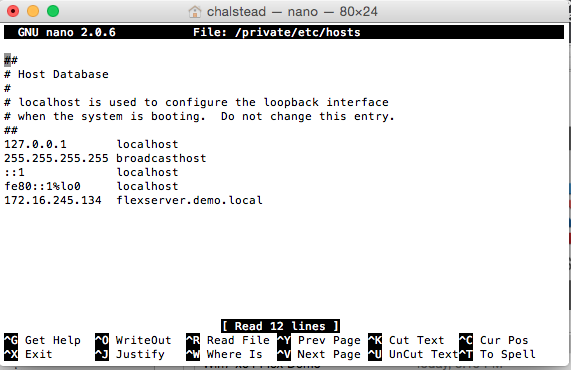
I am creating this entire environment on two Virtual Machines running on top of VMware Fusion. In order to get proper name resolution which is required for FLEX I am using a custom entry in the local hosts file on my mac.
Certificates:
Certificates are critical to a FLEX installation and a CA issued or Third-Party certificate should be used. The certificate chain (cert + CA cert) need to be installed and trusted on the client systems which are running Fusion or Player Pro as well. This is only needed if you are using a certificate from a CA that is internal and not a generally trusted certificate like one from GoDaddy, Entrust, Etc.
Request a certificate from a Microsoft CA
In this example I will be using a 2008R2 Domain Controller with the Active Directory Certificate Services role enabled in the Demo Domain.

Create and use a Microsoft CA generated cert with FLEX
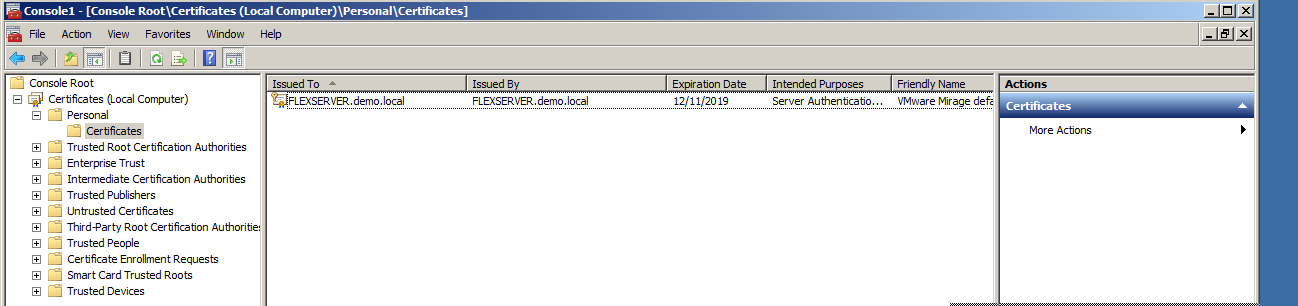
On the FLEX Server start the Certificates MMC snap-in and select “Local Computer”
- Navigate to “Personal” | “Certificates”
- Right-Click the Certificates folder and choose “Request new Certificate”
- Select “Active Directory Enrollment Policy”
- Choose “Web Server” – and Enter the Following at a minimum:
- Common Name – FQDN of the Server
- Alternative Name –
- DNS – FQDN of the Server, IP Address if using local hosts file
- IP Address
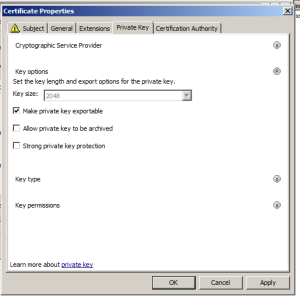
- Private Key – Make the Private Key exportable


- Hit Enroll to generate the certificate.
- Verify the certificate is installed and has the proper settings
Export Certificates
You will need to export the Certificate from the CA and from the FLEX Server. These should be placed in a location accessible by the clients you will use to connect to the FLEX server from. They need to be trusted on those endpoints in order to connect and pull policies properly from a FLEX Server. If you don’t have the full certificate chain installed and trusted on the endpoint, you will receive an error that the VM can’t contact the policy server.
Export the Certificate from the Certification Authority

Export FLEX server certificate

Place them in a location you can get to from the client systems.
Trusting Certificates in Fusion:
Copy the certs to your Mac system and double-click them to open them in Keychain Access. The certificates should be in the login section of Keychain Access.
- Open the FLEX server certificate and expand Trust. Select “Always Trust” for SSL.
- Save the Changes
- Open the Root CA certificate and expand Trust. Select “Always Trust” and save changes.
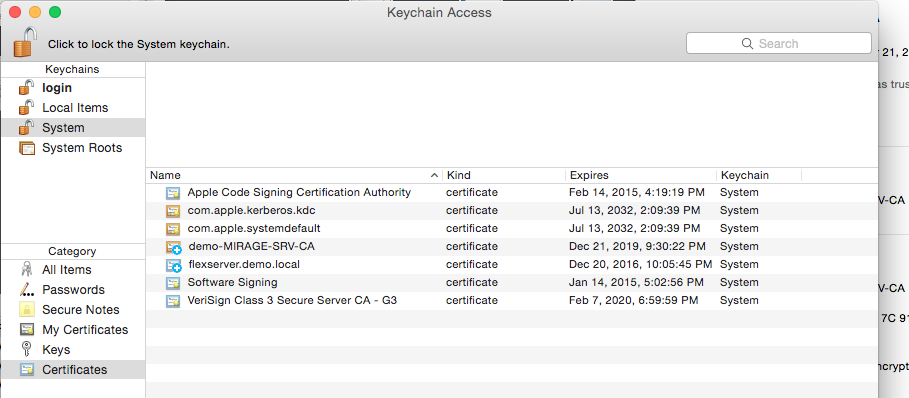
Copy both of the Certificates to “System” Folder to make sure they are trusted by all users and local system processes such as the .VMX processes in Fusion


Trusting Certificates in Windows for Player Pro:
We need to install the FLEX certificate and the Root CA certificate into the Windows system which will run VMware Player Pro and host the FLEX VMs. Copy the certificates to the Windows system.
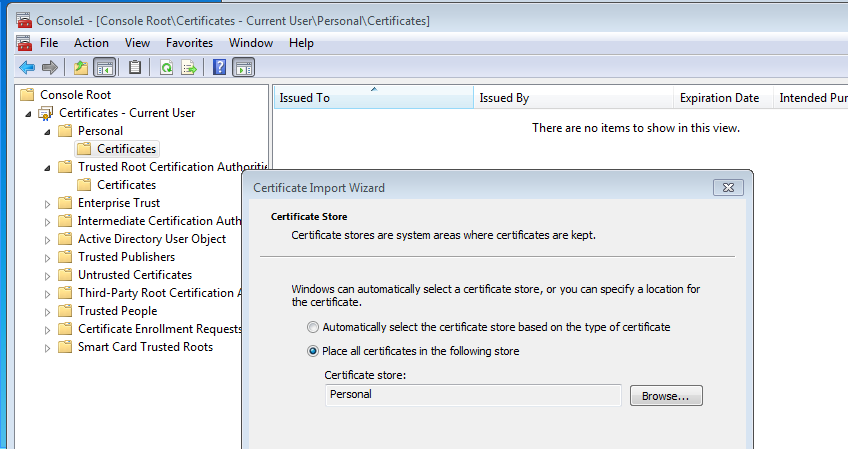
- Open the Certificates MMC snapin – first as Current user
- Import the FLEX server certificate into Personal | Certificates
- Import the Root CA certificate into Trusted Root Certification Authorities | Certificates
- This may already be there if the client is a member of the same AD Domain
- Open the Certificates MMC snapin – as Local Computer
- Import the FLEX server certificate into Personal | Certificates
- Import the Root CA certificate into Trusted Root Certification Authorities | Certificates
- This may already be there if the client is a member of the same AD Domain
Install VMware Mirage 5.2 Management Server:
Before installing the Mirage 5.2 Management server, make sure you have a SQL server setup with appropriate permissions to create the Mirage database. Mirage also requires that the .NET 3.5.1 Framework feature is installed on the server.
- Make sure the .NET 3.5.1 Framework feature is enabled on the server.
- Open a command prompt as Administrator
- Browse to the director containing the Mirage installation.
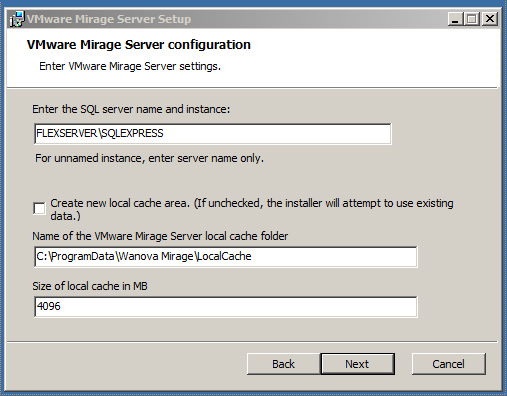
- Execute mirage.management.server.x64.21788.exe (or latest build)
- Enter the SQL server name and instance where the Mirage DB will be located. You can also choose a new storage area where Mirage client data will be located.


- Select the account to run the Mirage Management Server as. For production environments, it is recommended to use a Domain account.

Walk through the remainder of the installation process and leave the Administrator console open.
Install Mirage 5.2 Server:
The Mirage server is a stateless system that does the processing and should be scaled out horizontally in a production environment. There should be a minimum of two Mirage servers in any production environment which are load balanced.
- Execute mirage.server.x64.21788.exe or latest build
- Enter the SQL server name and instance that was used to install the Mirage management server. A custom path can also be entered for the Local Cache. This is the deduplication store and will benefit from fast storage such as SSD.
- Choose to use SSL or not for the Mirage server transport. It is highly recommended to use SSL and it is a requirement if you want to use the Mirage Gateway feature for external access from a Mirage management perspective. NOTE: The Mirage Gateway will only handle Mirage (tcp 8000) traffic. It will not handle FLEX traffic (tcp 7443). That traffic will need to be port forwarded or managed via a reverse HTTPs proxy to allow external connectivity. You can use the self-signed certificate that Mirage creates or a third-party or internally generated certificate here.

- Select the system to run the Mirage server service as. This should be a domain account if you will have more than one Mirage server as they need to be able to access the same storage locations. This is particularly important if using storage such as CIFS.
- Finish the installation wizard and choose NO when asked to reboot.
- Run mirage.management.console.x64.21788 from the administrator console – this will install the MMC based Mirage Management Console.
- Reboot.
Test Connection to the Mirage Server
We will now test basic connectivity to the Mirage server before installing the Mirage/Flex components.
- Open the Mirage Management Console on the desktop
- Right-Click VMware Mirage and choose “Connect to Server on localhost”. Verify successful connection.


Install Mirage Web Management Components:
We will now install the Mirage Web Management Components. This is where the FLEX admin console is located. There are some requisites we need to verify before intallation.
- Make sure .NET 4.0 is installed on the server
- The IIS role must be installed on the server and configured per this excerpt from the Mirage Admin Guide.

- Open a command prompt as Administrator and browse to the location where the Mirage installation files are located and execute:mirage.WebManagement.x64.21788.exe in the Web Management folder.
- Select the location of the Mirage Management server and the ports. Leave the defaults ports if possible.

- Walk through remainder of the wizard and click “Finish” when it is complete.
Create a Folder for Image Downloads
This is the folder where the image files created in FLEX will be download from to the remote clients. This can be on any web server. It does not have to reside on the FLEX server. The only thing to keep in mind is that the file must be able to be downloaded directly without any authentication challenge as FLEX is expecting this. For this article, I will create the download folder on my FLEX server.
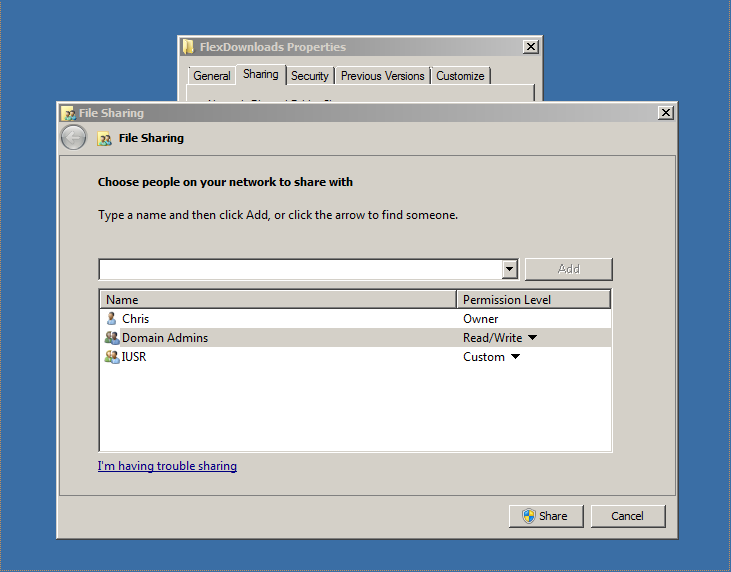
- Create a folder and assign permissions for users to be able to download the FLEX images. In my environment I gave the ISR account read access. Whatever account only needs read only access to the folder at the NTFS level.

- Optional – I like to share this directory out to an Administrative Group to make the import process easier.
Create a Virtual Directory in IIS to allow the FLEX images to be downloaded.
- Open the IIS administrator and browse to “VMware Mirage Management Web Site” then click on “rvm”
- Right-click rvm and choose “Add Virtual Directory”
- Set an Alias (remember this)
- Browse to the directory you created earlier for the FLEX images.
- Click OK

- Set the “VMware Mirage Management Web Site” to use the Certificate identified earlier. This should have been placed in Personal | Certificates.
- DO NOT use the self-signed certificate that Mirage installs. It does not have a fully qualified host name in the Subject Alternative Name file and will NOT work with FLEX
- Select the VMware Mirage Management Web Site and then click “Edit Bindings” on the Right Column.

Test FLEX Admin Console Connection
- Open a web browser (must be Firefox or Chrome, not IE) to https://servername:7443/RVM
You may have to confirm a security exception if using a self-signed certificate.
You will see a page like the one below. Log in with a domain account that has access to Mirage.

Now that we have verified basic configuration and connectivity we will configure the FLEX components.
Create FLEX Image:
We will now create the FLEX image that we want our users to download and that we will manage through policy. This process needs to be done on VMware Workstation 11 or VMware Fusion 7.x with a FLEX license installed. The FLEX license is very important because without it you will not be able to set the policy type to “Managed” which is a requirement. I will be using VMware Fusion in this article. It should look like this from a versioning perspective.

Create a new Virtual Machine and Configure it for FLEX
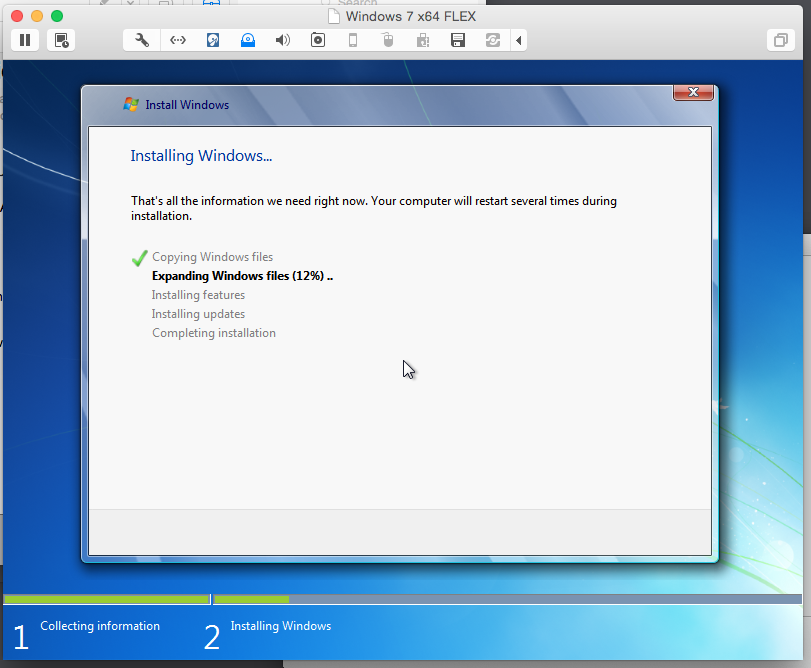
- Create a new virtual machine using the Easy Install process if preferred.

- Customize the Virtual Machine as needed and start the install process. Wait for the install process to complete.
- When the OS install and VMware Tools install process is complete, shut the Virtual Machine down. We will apply encryption next.
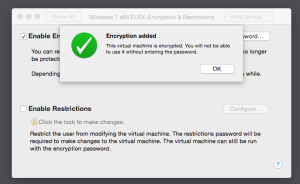
- Go to Virtual Machine settings and choose “Encryption and Restrictions”

- Check “Enable Encryption” – You will be prompted for your username and PW and then the encryption process will start. Wait for this process to complete. Remember the password you used to encrypt this VM. Your users will need this password to use the FLEX VM!
- Select “Enable Restrictions” – You will be prompted for a password to be used to manage restrictions on this VM. Do not lose this password or you will be unable to change restrictions settings for this VM!


- Click the “Configure” button

- Select “Managed” in the “Restrictions Type” drop-down:
- Enter the path to your FLEX Server (Example: https://flexserver.demo.local:7443)
- Do NOT add /rvm at the end of the URL
- Click “Check Server” then Save
- Optionally, you can import certificates that will be the only certs trusted for the VM.

- Power the VM back on and configure it with any applications you want the user to have. You can also configure a Mirage client at this time so the system will be protected and you can deploy applications to the VM. This would also be the time to add this system to the Domain if wanted.


- If you want the FLEX images to join your Domain, you need to prepare them, by installing a VMware RVM service.
- Open a command prompt as Administrator
- Browse to the VMware Tools Directory
- Run rvmSetup.exe -I
- Verify that the VMware RVM Setup Service is installed.
- Install any additional required software and shut down the VM

Import the FLEX image into your FLEX Server:
- When the VM is shut down, navigate to the Virtual Machine and from Fusion select File | Export to Tar
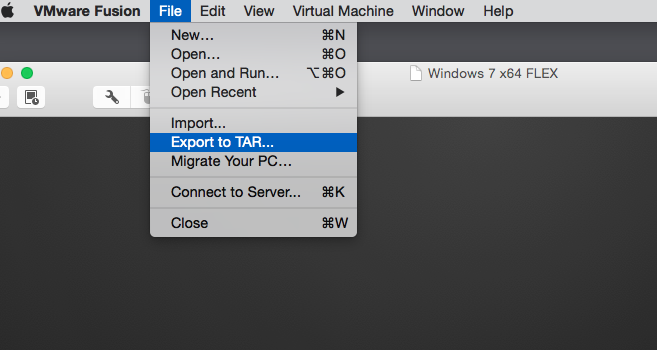
- If you shared out the Downloads directly export it directly there, if not copy it somewhere you can get to from the Mirage Server. You want to put this .tar file in the Downloads folder you created earlier on the Mirage Server. Tip: Make sure to remove any spaces in the name of the .tar file. This will make it easier to connect to the URL (example: win7x64flex.tar).
- Wait for the export and make sure the .tar file is located in the Downloads folder you created earlier.
- You also need the .vmx file of the Virtual Machine on the Mirage Server. We will copy that now.
- If using Fusion, find the Virtual Machine package file and right-click it and choose “Show Package Contents”. If using Workstation, just open the VM folder and copy out the .vmx file.
- find the .vmx file and copy it to the Mirage Server. It shouldn’t be in the downloads folder. It just needs to be in a location accessible from the Mirage server when you create an image in the FLEX admin console.

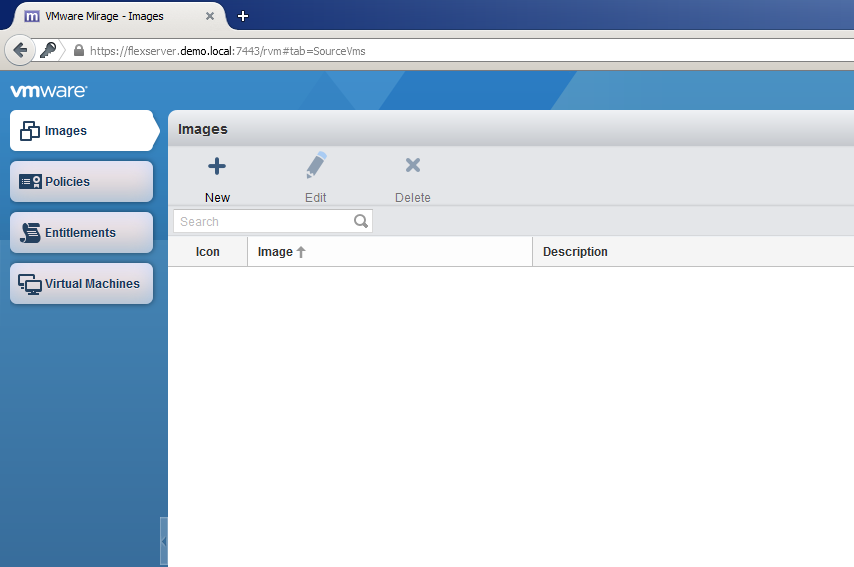
Import Image into FLEX Server:
- On the Mirage Server, connect to https://servername:7443/rvm
- Log in and select “Images”
- Click the “New” Button
- Provide the following information
- Image Name: Friendly Name for this Image
- Image URL: Fully Qualified Path to the Image File. This is the location where you placed the .tar file. (Example: https://flexserver.demo.local:7443/rvm/flexdownloads/win7x64flex.tar)
- Description: Optional Description of this Image
- Select Image File: This is the .vmx file that you exported earlier. Select browse and select the appropriate .vmx file for this image
- Icon: Optional Icon for this Image
- Image EULA: Optional EULA to be shown when the user uses the image
- Click OK when all settings are entered. This will save the image file.

- Verify the download URL
- Open a web browser and paste in the URL path you entered under Image URL
- Example: https://flexserver.demo.local:7443/rvm/flexdownloads/win7x64flex.tar
- If you get a permissions error, the NTFS permissions need to be adjusted. It should ask you to save the file.
- Example: https://flexserver.demo.local:7443/rvm/flexdownloads/win7x64flex.tar
- Open a web browser and paste in the URL path you entered under Image URL
Create a Policy:
The FLEX policies control what the default settings are for FLEX managed virtual machines that are controlled by that policy. Settings include:
- Expiration Date of the Virtual Machine – The machine can no longer be powered on after that date if the date is not adjusted
- If USB Devices Can be passed through to the VM
- If the user can copy/paste data to or from the VM
- If the user can drag/drop data to or from the VM
- Messages displayed to users when the machine expires or is getting close to expiring
- Flex Server URL and how often the client will poll the FLEX server
- Offline Time limit – how long the VM can be offline with no contact with the FLEX server before it will become locked.
Select the Policies Tab and adjust setting as wanted and click OK

Create Entitlement:
An Entitlement is the combination of an Image, a Policy set and a user or group of AD users who are entitled to download and execute the VM.
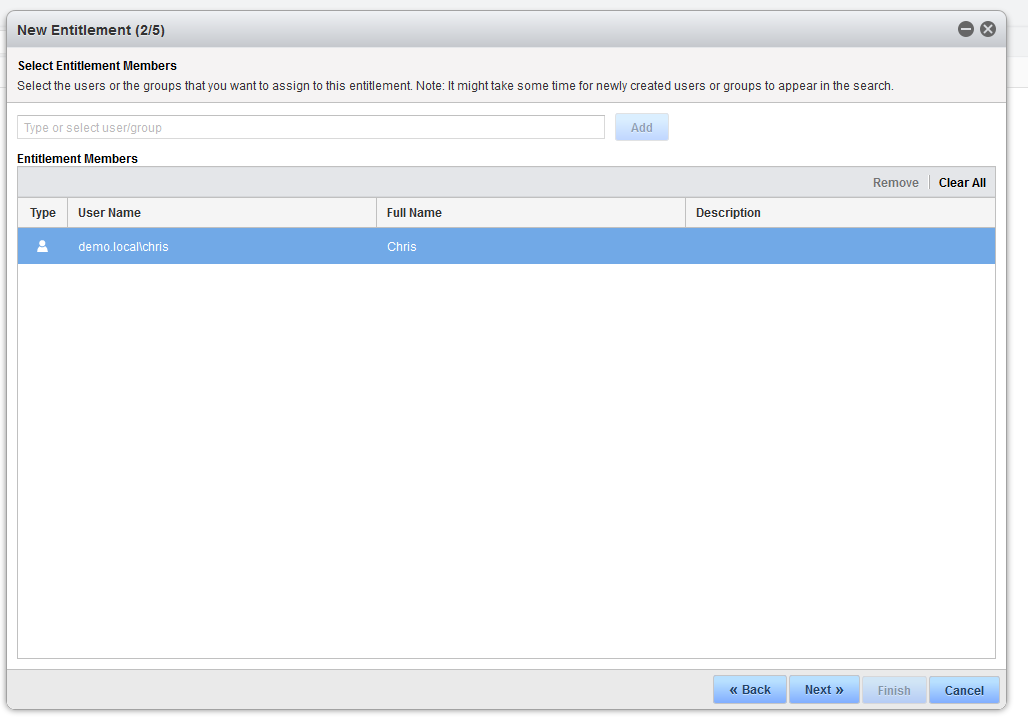
- Click the Entitlements tab, then click New
- Enter an Entitlement Name, select an Image and click Next
- Type an AD user or group and click add
- this is a little touchy – type part of the user or group name and it will autocomplete
- Note: it may take a few minutes for newly created accounts to show up.
- Click Next
- Select the Policy and then click Next

- Enter machine patten and domain information if you want these systems to be renamed and added to your domain.

- Click next then Finish – Congratulations – You have created a FLEX Image!
Download the FLEX Image from a Client
To download a FLEX managed image, you need either VMware player Pro or Fusion Pro with a FLEX license attached. To download the image do the following
- Player Pro with FLEX.
- Select the “Connect To Server” icon

- Enter the path to the server
- Example: flexserver.demo.local:7443
- Enter domain credentials for account entitled to the image
- domain\user
- Password
- You may get a certificate warning if you used a self-signed certificate
- Click “Continue Anyway”
- Select the “Connect To Server” icon


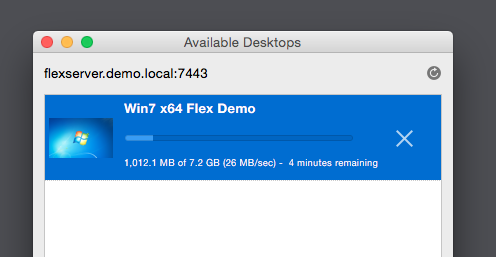
- The image(s) the user is entitled to will show up. The user can now choose to download the image
- The user will select a folder to place the Virtual Machine in.
- Monitor the download process.


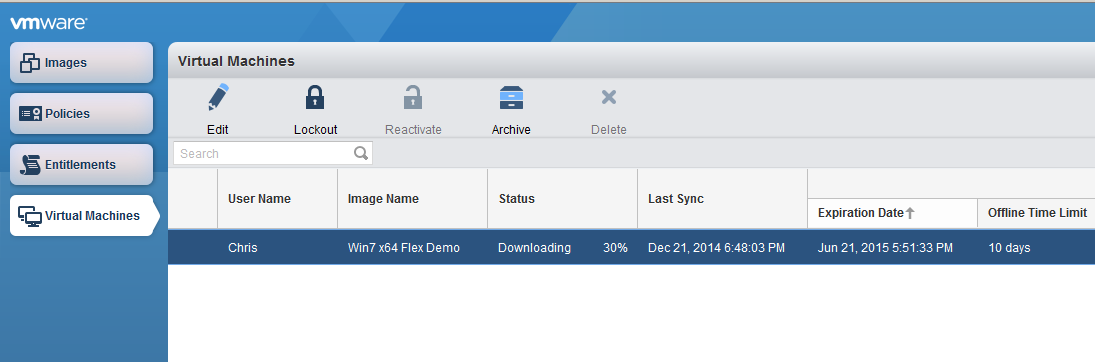
- The download can also be monitored from the FLEX admin console at https://flexserver:7443/rvm
- Select the “Virtual Machines” tab to monitor the download from the server side.
- Once the FLEX VM finishes downloading and extracting you will be prompted for the password the VM was encrypted with to unlock it.

At this point the VM can be powered on and used by the user.
VMware Fusion Pro with FLEX
- Go to File | Connect to Server or Apple – K
- Enter the path to the server and the username and password of the Domain user entitled to the image.
- Example: flexserver.demo.local:7443
- Enter domain credentials for account entitled to the image
- domain\user
- Password
- You may get a certificate warning if you used a self-signed certificate.


Select the image and click the “download” icon

- Once the FLEX VM finishes downloading and extracting you will be prompted for the password the VM was encrypted with to unlock it.
- Power the machine on and change the restrictions password if prompted.

Notice my FLEX machine used the naming convention specified in the entitlement and that it also joined the Demo Domain.
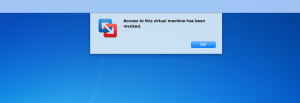
NOTE: If you have connectivity or certificate issues you may see the message below. Double-check the certificates are trusted and also that you have the proper path to the restrictions management server (https://server-fqdn:7433)

Managing Policies on FLEX deployed Virtual Machines:
Once you have connect a FLEX VM to the policy server you can connect to https://flexserver:7443/rvm and adjust policy on the individual VM’s
The following can be adjusted on a per-vm basis
Policies:
- Expiration Date – Date when the machine will no longer be accessible by the user. It will no longer start up after this date. The administrator can re-enable the VM by extending the expiration date.
- Lockout – Lock the VM by revoking access and prevent the user from starting it up. This can be useful for situations where you need to quickly prevent the user from accessing the system at all.
- Reactivate – Unlock a VM that is currently locked.
- USB – Allow or Prevent USB devices from being connected to the FLEX VM
- Copy/Paste – Allow / Prevent copy and past to/from the FLEX VM
- Drag / Drop – Allow / Prevent users from dragging and dropping files in / out of the FLEX VM.
- NOTE: both copy/paste and drag/drop polices require a system reboot to change the setting
- Require the user to change the power on passphrase when moving or copying the virtual machine. – When the machine is initially copied down and any time it is moved to another storage location the user must set a new restrictions password
Messages:
- Message to display when the Virtual Machine Expires
- Message to display when the Virtual Machine is nearing Expiration
Server Settings:
- FLEX Server URL: This should always be https://flexserverfqdn:7443
- Server Contact Frequency: How often will the client poll the policy server for changes. (minimum setting is 5 minutes)
- Offline Time Limit: How long can the Virtual Machine go without contacting the policy server before it becomes locked


Hopefully this article was helpful in assisting the installation and configuration of FLEX. Please let me know if you have an questions or notice any errors in this article.
I can be reached on twitter at @chrisdhalstead
Thanks!


Thanks Chris. It was quite an adventure but this post seriously helped me out.
Thanks Justin – glad it helped!
Thank Chris, this is a great support document, which I was not able to find from anywhere else, even in VMware site. Most of the information you mentioned here not documented anywhere.
I am trying to setup Flex image using VMware Workstation version 10. In that there is no option to export the VM. I am stuck there, it will be great if you can guide how to create the image using Workstation also,
Thanks
Roshan – Thanks for the feedback! For Workstation you can simply manually zip up the VM folder. Just find the folder where the Virtual Machine is created (usually under Documents) and Zip or Tar the directory manually at the root of the directory. You want to make sure that all of the VM files are not in a subfolder when the file is added to a ZIP or TAR file. Once you do that, you can just copy it to the downloads folder. I am going to add this piece to my Flex article tomorrow, so check back. Thanks – Chris
Dear Chris,
Thank you very much for your prompt response.
I created a .ZIP file as you instructed and tried to create the New Image. But when I select the .VMX file it tries to import and give the error “Invalid Image file”. What could be the problem here? My VM was named as “Flex Image” so the file name is “Flex Image.vmx”, this space in the vmx file can be a problem?
Thanks and Best Regards
Roshan
Roshan – I haven’t seen that before. You are selecting the .VMX file from the “Select Image File” section correct?
Also, make sure you copy the .VMX file out of the VM directory manually and that you don’t try to pull it out of the Zipped VM file.
You should have two files, the .VMX and the .tar or .zip file.
Let me know if still having issues and I will investigate.
Thanks!
Chris
Roshan, I’m not certain if it’s the same issue, but I received a similar message at one point when trying out this procedure. It seemed to have to do with the fact that the VM I was exporting was renamed between the time that I created it and the time I tried exporting it. At least that was my theory at the time. I never completely validated the theory but had success after creating a new VM from scratch and exporting it without ever renaming it.
Dear Chris,
Thanks for the reply. Yes I did exactly the same way you have explained. Now I am creating fresh image with no space in the name. I will keep you updated once I tried with the new image.
Best Regards
Roshan
Hi Justin,
As you mentioned I am also going create a fresh image. Thanks for the reply.
Best Regards
Roshan
Hi Chris,
As suggested I have recreated a new image and imported. There was no problem with that. But now I get a new error. When connected from the Vmware Player and trying to download the image it give the error;
2015-01-14T10:00:20.132+05:30| vmplayer| I120: [msg.log.error.unrecoverable] VMware Player unrecoverable error: (vmplayer)
2015-01-14T10:00:20.133+05:30| vmplayer| I120+ VERIFY d:/build/ob/bora-2305329/bora/lib/ssl/ssl.c:5792
2015-01-14T10:00:20.133+05:30| vmplayer| I120: [msg.panic.haveLog] A log file is available in “C:\Users\akila_000\AppData\Local\Temp\vmware-akila_000\vmware-vmplayer-5152.log”.
2015-01-14T10:00:20.133+05:30| vmplayer| I120: [msg.panic.requestSupport.withoutLog] You can request support.
2015-01-14T10:00:20.133+05:30| vmplayer| I120: [msg.panic.requestSupport.vmSupport.vmx86]
2015-01-14T10:00:20.133+05:30| vmplayer| I120+ To collect data to submit to VMware technical support, run “vm-support”.
2015-01-14T10:00:20.133+05:30| vmplayer| I120: [msg.panic.response] We will respond on the basis of your support entitlement.
2015-01-14T10:00:20.133+05:30| vmplayer|
I am using self signed certificate and imported and trusted in the host machine as instructed.
Can you please help me on this.
Best Regards
Roshan
Can you connect to the Image URL from a web browser? Copy and paste the entire image URL and try to connect via Browser example: (https://flexserver.domain.com:7443/download/image.tar). It should start downloading with no authentication. Let me know. Thanks!
wow, thanks for this tutorial. i’m just learning about this, to setup a testing environment at my work, and this is perfect! i can’t wait to fall crumbling to my knees a few times, before i finally get it right! 😉
Thanks again Chris.
Chris, thanks for putting this together. Awesome write-up! Wished VMware Horizon FLEX’s docs were as well-written as yours!